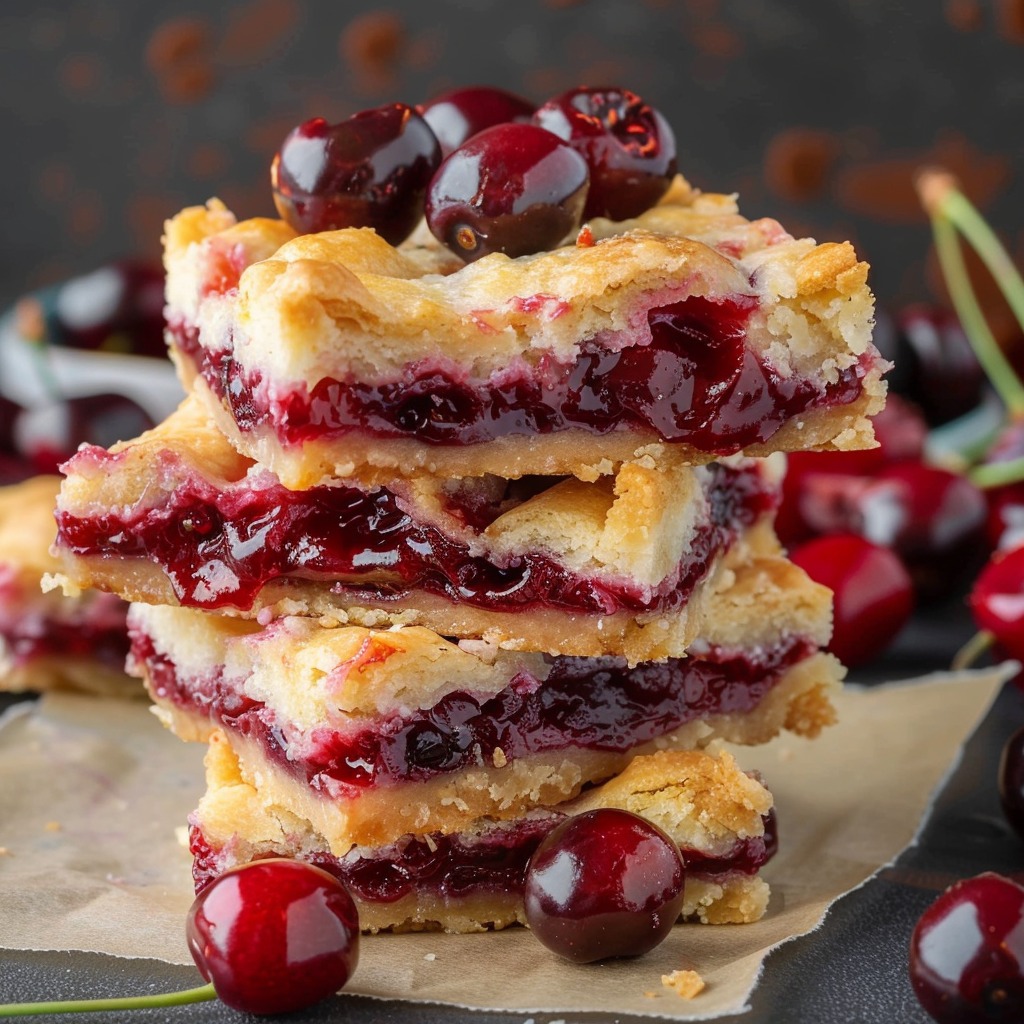
Delicious Cherry Pie Bars: A Simple Twist on a Classic Dessert
Love the flavors of cherry pie but want something a little easier to make? These delicious Cherry Pie Bars are the perfect solution! Featuring a buttery crust, a sweet cherry filling, and a crumbly topping, they’re everything you love about pie in an easy-to-serve bar. Perfect for parties, potlucks, or just a cozy dessert at home!
Ingredients
For the Crust and Crumble Topping:
- 2 cups (250g) all-purpose flour
- ½ cup (100g) granulated sugar
- ½ teaspoon salt
- 1 cup (225g) cold unsalted butter, cubed
For the Cherry Filling:
- 2½ cups (350g) fresh or frozen cherries, pitted
- ½ cup (100g) granulated sugar
- 1 tablespoon cornstarch
- 1 tablespoon lemon juice
- ½ teaspoon almond extract or vanilla extract (optional)

Instructions
Step 1: Preheat the Oven
Preheat your oven to 350°F (175°C). Line an 8×8-inch or 9×9-inch baking pan with parchment paper, leaving an overhang for easy removal.
Step 2: Make the Crust and Topping
In a large mixing bowl, whisk together the flour, sugar, and salt. Add the cold, cubed butter and use a pastry cutter or fork to mix until the texture resembles coarse crumbs. Reserve about ¾ cup of the mixture for the topping.
Step 3: Form the Base
Press the remaining crust mixture evenly into the bottom of the prepared pan. Bake for 10-12 minutes until lightly golden. Let cool slightly while you prepare the filling.
Step 4: Prepare the Cherry Filling
In a medium saucepan, combine the cherries, sugar, cornstarch, and lemon juice. Cook over medium heat, stirring frequently, until the mixture thickens and becomes glossy (about 5-7 minutes). Remove from heat and stir in the almond or vanilla extract for added flavor.
Step 5: Assemble the Bars
Spread the cherry filling evenly over the baked crust. Sprinkle the reserved crumb mixture over the top for a crumbly, golden finish.
Step 6: Bake the Bars
Return the pan to the oven and bake for 30-35 minutes, or until the topping is golden brown. Let the bars cool completely in the pan before slicing into squares.
Pro Tips for the Best Cherry Pie Bars
- Use Fresh or Frozen Cherries: If using frozen cherries, be sure to thaw and drain them to avoid excess liquid in the filling.
- Chill the Dough: If your kitchen is warm, chilling the dough mixture before pressing it into the pan can help prevent sticking.
- Add a Sweet Glaze: For a touch of extra sweetness, drizzle a glaze over the cooled bars made with powdered sugar and milk.
Why You’ll Love This Recipe
- Quick and Easy: No rolling dough or complicated pie crusts—just simple steps and delicious results.
- Perfectly Balanced: Sweet, juicy cherries and a buttery crust make the perfect combination.
- Versatile: Great for holidays, potlucks, or a sweet weekday treat!
Try These Cherry Pie Bars Today!
Turn your love for cherry pie into an easier, more portable dessert with these Cherry Pie Bars. They’re simple to make, packed with flavor, and guaranteed to be a hit wherever you serve them. Give this recipe a try today, and let us know how they turned out in the comments below. Happy baking!